A while back I wrote about Creating your own custom Subversion management layer which involved rolling your own UI in .NET to perform common management tasks in SVN such as provisioning a repository or managing permissions. This is a great way of quickly and easily giving users a self-service mechanism for managing their own repositories in a controlled, secure fashion.
Continuing the theme of customising SVN to do your bidding I thought I’d share some info on commit hooks. There are a heap of examples out there in Python and Perl but not much in the .NET realm so hopefully this will make someone’s life a little easier.
As with the previous blog post, all the info in this post relates to a Visual SVN Server instance of Subversion. Having said that, there’s nothing specific to this particular SVN distribution so the concepts and code snippets should be equally relevant to any others.
About commit hooks
A common SVN practice, and a good use case for writing a bit of code, is to create event hooks which fire at certain points in the transaction lifecycle of a commit to a repository. Valid transaction lifecycle events include start-commit (before a transaction is created), pre-commit (the transaction is complete but not committed) and post-commit (the transaction is committed and a new revision has been created). There are half a dozen other hook events relating to different server events but we’ll ignore them for the purpose of this post.
Let’s look a bit more into what the SVN book has to say about the pre-commit hook:
This is run when the transaction is complete, but before it is committed. Typically, this hook is used to protect against commits that are disallowed due to content or location (for example, your site might require that all commits to a certain branch include a ticket number from the bug tracker, or that the incoming log message is non-empty). The repository passes two arguments to this program: the path to the repository, and the name of the transaction being committed. If the program returns a non-zero exit value, the commit is aborted and the transaction is removed. If the hook program writes data to stderr, it will be marshalled back to the client.
By far the most common use case for pre-commit hooks is ensuring a revision is accompanied by an appropriate comment. “Appropriate” may simply mean characters must exist or it could lay out some rules for what constitutes an acceptable pattern. Another common use case is to prohibit certain file patterns. For example, the Thumbs.db file really shouldn’t exist in your repository and you may want to enforce its exclusion.
How a commit hook is invoked
As with most things Subversion, it’s pretty simple. If a correctly named executable or script exists in the “hooks” folder of the repository it will be executed at the appropriate time in the transaction. Here you can see a series of template files automatically created by SVN when the repository is provisioned:
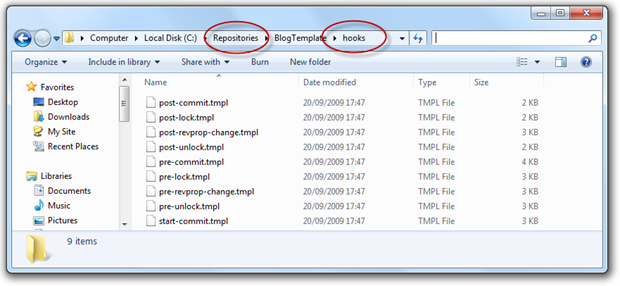
Each template file has a sample Unix script inside so if you’re running in that environment you can just drop the .tmpl extension, give it execute rights and you’re good to go. I’m going to write .NET based hooks in this example but just for a sense of what comes out of the box, here’s the contents of the pre-commit.tmpl file:
REPOS="$1" TXN="$2"Make sure that the log message contains some text.
SVNLOOK=/usr/local/bin/svnlook
$SVNLOOK log -t "$TXN" "$REPOS" |
grep "[a-zA-Z0-9]" > /dev/null || exit 1Check that the author of this commit has the rights to perform
the commit on the files and directories being modified.
commit-access-control.pl "$REPOS" "$TXN" commit-access-control.cfg || exit 1
All checks passed, so allow the commit.
exit 0
There are two main behaviours this script has in common with the one I’ll write in this post:
- There are two arguments being passed to the script declared as REPOS and TXN.
- There is a response code returned being a 1 for a failure or 0 for success.
Creating the solution and reading the args
As mentioned above, all we need is an executable so let’s just build a console app called “SvnPreCommitHooks”:
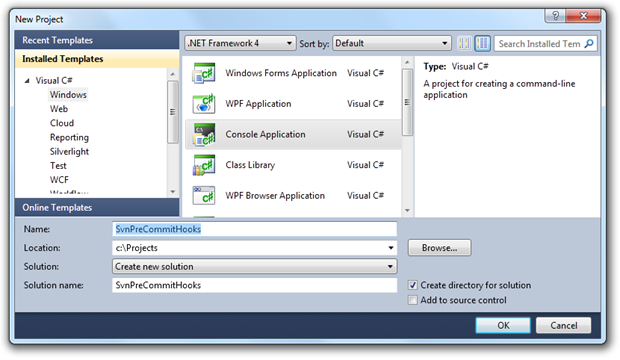
You’ll get a Program.cs file to act as the entry point to the console app. Let’s start off by following the pattern in the template file above and declaring variables for the two arguments that will be passed to the hook:
namespace SvnPreCommitHooks
{
  class Program
  {
    static void Main(string[] args)
    {
      var repos = args[0];
      var txn = args[1];
The repos argument is the full path of the repository which going by the folder structure in the grab above will be c:\Repositories\BlogTemplate. The txn argument is the commit transaction name and this is something we need to understand a little bit more about before we proceed.
Understanding transactions
The commit transaction name is generated by SVN and comprises of the next revision number and the transaction number in a format such as “3-6” (revision 3, transaction 6). If the transaction succeeds and becomes a new revision then the next txn value will be “4-7”. If it fails then no revision will be created and the next txn value will be “3-7”. The Subversion book explains the process in Understanding Transactions and Revisions:
Every revision begins life as a transaction tree. When doing a commit, a client builds a Subversion transaction that mirrors their local changes (plus any additional changes that might have been made to the repository since the beginning of the client's commit process), and then instructs the repository to store that tree as the next snapshot in the sequence. If the commit succeeds, the transaction is effectively promoted into a new revision tree, and is assigned a new revision number. If the commit fails for some reason, the transaction is destroyed and the client is informed of the failure.
You really don’t need to understand the inner workings of SVN transactions to build hooks but one important point to comprehend is that in order to reject a commit at the pre-commit event we still need to create an entire transaction on the server. This means transferring all the intended commit content to the server which, depending on the data being committed, may mean waiting while large volumes of information is being transferred. And your commit could be rejected causing you to remedy the root cause and go through the entire process again!
Using svnlook to inspect the transaction
So the pre-commit arguments tell us where the repository is and what transaction we need to inspect before promoting it as a new revision. The next thing we need to do is inspect the transaction so we can understand exactly what it is the author is trying to put into the repository. This is where svnlook comes in.
The svnlook command comes packaged with Visual SVN Server and the location is added to the “path” system environment variable on install so it can be invoked from any directory on the system. To get an idea of the sort of information this command can retrieve, here’s what it reports for the last log message and then the last changed paths in the BlogTemplate repository:

The log message is pretty straight forward but let’s look further at the changed paths. What we’ve get here is a collection of rows with each one specifying an action (“D” for deleted, “U” for updated and “A” for added) followed by the path of the file within the repository. In the example above I’ve ditched the .suo file (solution user options shouldn’t be maintained under source control as they’re user specific) and updated the “Blogger Template.xml” file. The commands above have only specified a repository path argument for the respective subcommands but another valid argument is the transaction which is what we’re going to look at next.
Back to the console app; we’ve got the repos and txn arguments and we now know what svnlook can do with them so let’s tie it all together:
private static string GetSvnLookOutput(string repos, string txn, string subcommand) { var processStartInfo = new ProcessStartInfo { FileName = "svnlook.exe", UseShellExecute = false, CreateNoWindow = true, RedirectStandardOutput = true, RedirectStandardError = true, Arguments = String.Format("{0} -t \"{1}\" \"{2}\"", subcommand, txn, repos) };var process = Process.Start(processStartInfo);
var output = process.StandardOutput.ReadToEnd();
process.WaitForExit();
return output;
}
The subcommand parameter is going to allow us to reuse the method for both “log” to get the commit comment and “changed” to get the files and actions. The ProcessStartInfo class allows us to reference both the svnlook command and the parameters after which the Process class will run svnlook and give us back the output in a string. We’ll go back up the entry point of the console app and save the output to variables:
var log = GetSvnLookOutput(repos, txn, "log");

var changedPaths = GetSvnLookOutput(repos, txn, "changed");
Validating the log message
We’re going to say a valid log message must comprise of at least 20 characters and 5 words so let’s encapsulate that within another method. As the message could be invalidated by two different conditions we’re going to give the user a bit of information about what went wrong rather than just returning a boolean. No errors will mean a null message:
private static string GetLogMessageErrors(string log)

{

if(log.Length < 20)

{

return "Message is less than 20 characters.";

}

if(log.Split(' ').Length < 5)

{

return "Message is less than 5 words.";

}

return null;

}
Validating the changed paths
Moving on to the changed paths, cast your mind back to the svnlook output further up. We’ll start by removing the trailing line return with a TrimEnd then split the changedPaths string lines based on Environment.NewLine. Each row then consists of a character to represent the change type, 3 spaces than the changed path which obviously contains the file name. Let’s extract all these out into variables then apply a little conditional logic:
private static string GetFileNameErrors(string changedPaths)

{

var changeRows = Regex.Split(changedPaths.TrimEnd(), Environment.NewLine);

foreach (var changeRow in changeRows)

{

var changeType = changeRow[0];

var filePath = changeRow.Substring(4, changeRow.Length - 4);

var fileName = Path.GetFileName(filePath);

if(changeType != 'D' && fileName == "Thumbs.db")

{

return "Thumbs.db file was found.";

}

}

return null;

}
One thing worth noting here is that we’re only going to return an error if the change type is “D” for “Delete”. Although this condition should be impossible if the hooks are applied to a brand new repository (the file could never have been added in the first place), we may well apply the pre-commit hook to an existing repository. In this scenario the hook would still prohibit adding or changing the Thumbs.db file but obviously we’d like to retain the capability to remove it.
Exiting the hook
That’s pretty much all the legwork done, we now just need to invoke the two methods created above and exit the program with a message and either a success or failure:
var logValidation = GetLogMessageErrors(log);
if(logValidation != null)
{
Console.Error.WriteLine(logValidation);
Environment.Exit(1);
}var changedPathsValidation = GetFileNameErrors(changedPaths);
if (changedPathsValidation != null)
{
Console.Error.WriteLine(changedPathsValidation);
Environment.Exit(1);
}Environment.Exit(0);
It’s pretty obvious from the above but an exit code of 1 will tell SVN to rollback the transaction while 0 indicates success. In both the error states I’ve included a bit of information about what went wrong to try and help the user rectify things on the next go.
Joining all the dots
All we need to do now is compile the project and get the executable invoked on pre-commit. To save on redundancy, we’re going to place the compiled SvnPreCommitHooks.exe directly into the c:\Repositories folder then create a little bootsrapper to place in each repository hooks folder. Let’s save the following as pre-commit.cmd:
C:\Repositories\SvnPreCommitHooks.exe %1 %2
The command file can now be replicated across as many repositories as required without increasing maintenance burden should the console app need to change. It’s also very easy to tie the creation of this file into the custom repository provisioning process I referenced right at the start of this post so that all new repositories can take advantage of the hook.
Testing the hook
This is the fun part! Let’s run through all the test cases using TortoiseSVN:
No message with one valid file and one invalid file:
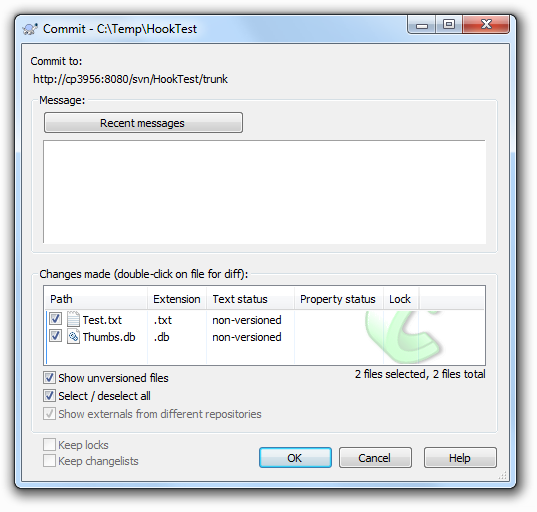
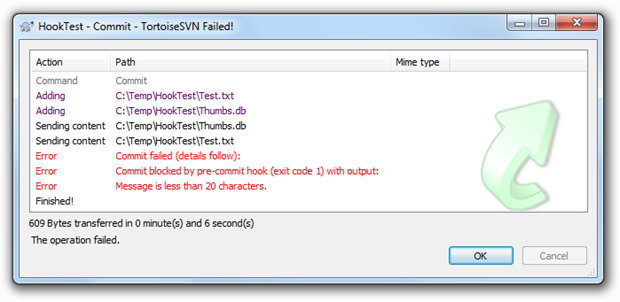
Fail with an error notification about the message being too short:
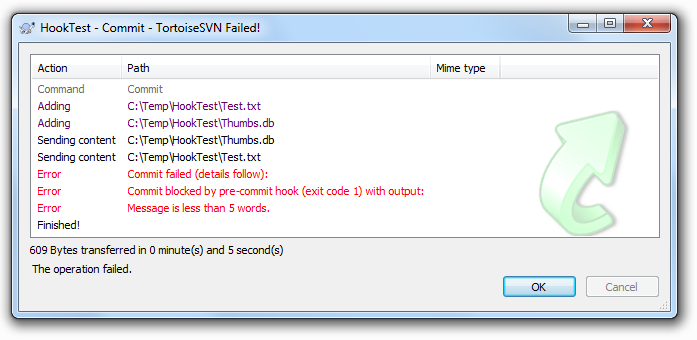
Less than 5 words with one valid file and one invalid file:
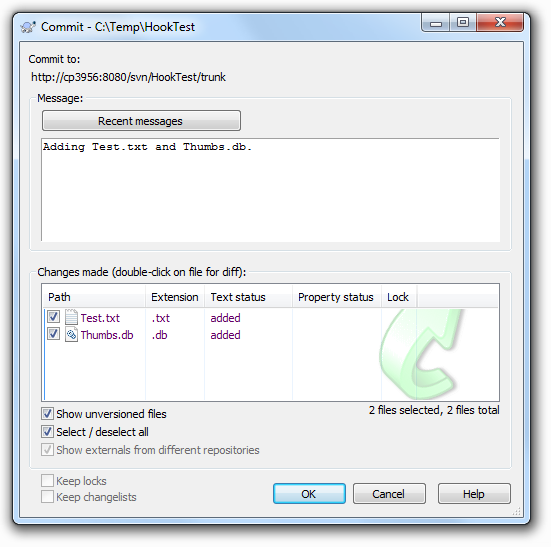
Fail with an error notification about an insufficient number of words:
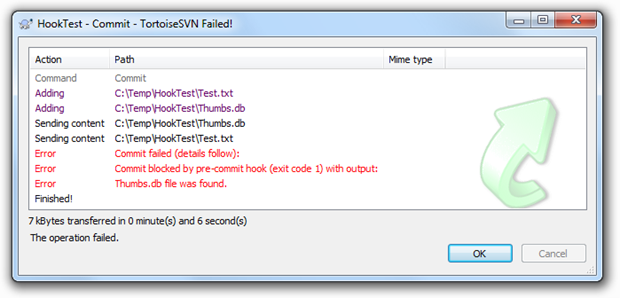
Valid message with one valid file and one invalid file:
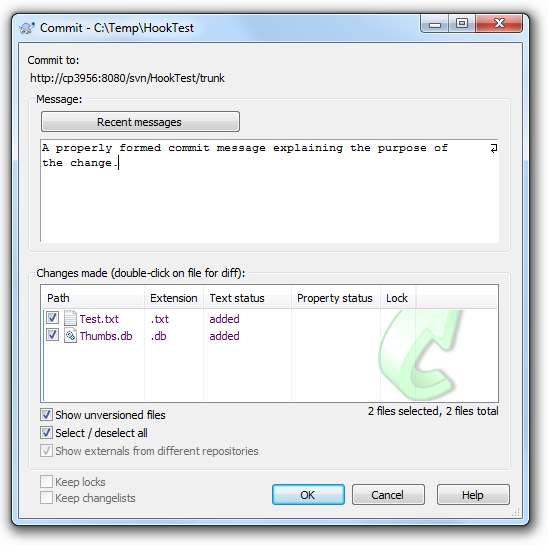
Fail with an error notification about a disallowed file:
Valid message with one valid file:
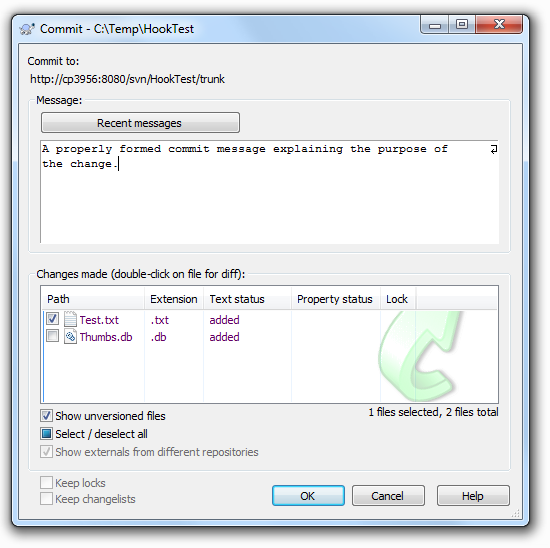
Success!
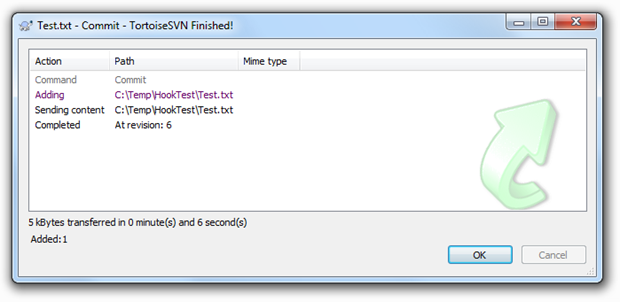
Wrapup
This has been an intentionally simple illustration more to point the .NET reader in the right direction rather than illustrate the potential of SVN hooks. A more applicable real world solution might involve a data driven set of rules or greater integration with other systems such as bug trackers or change logs. There might also be author or even time of day based rules depending on the requirement.
Hopefully this is enough to cover the SVN idiosyncrasies and from here on in it’s all business as usual .NET code wise. SVN is a fantastically versatile product and a few little tweaks like this can really increase both the value of the tool and make for a more productive source control experience.